The question isn’t whether your trail bike is ‘enough’ for a bike park; it’s whether you understand its mechanical limits.
- Your suspension setup (sag) and braking technique have a greater impact on safety and performance than your bike’s travel.
- Upgrading key components on your current bike is often more cost-effective and better for skill development than renting a downhill rig for your first few visits.
Recommendation: Master the physics of your existing setup—suspension dynamics, thermal management, and chassis balance—before you even consider buying a new bike.
The moment you book your first uplift day at a park like Bike Park Wales or Dyfi, the question hits: is my trusty trail bike up to the job? You see videos of 200mm downhill sleds ploughing through rock gardens and wonder if your hardtail or short-travel full-suspension bike is a liability. The common advice is to « just rent a DH bike, » but that overlooks a fundamental truth of mountain biking mechanics. Your safety and enjoyment aren’t dictated by the amount of suspension travel you have, but by your understanding of the forces at play.
Many riders focus on the wrong metric. They compare suspension travel in millimetres instead of analysing the critical factors: suspension dynamics, brake heat management, and the crucial confidence-to-competence ratio. A poorly set up full-suspension bike can be more dangerous than a well-ridden hardtail, and upgrading a few key components on your familiar bike often makes more sense financially and for your skill progression than wrestling with an unfamiliar rental.
This guide isn’t about declaring a winner between hardtails and full-suspension bikes. It’s a mechanic’s breakdown of the physical principles you need to master. We will dissect the non-negotiable safety gear, explain the physics of a proper suspension setup for rough UK tracks, analyse the rent-versus-upgrade dilemma, and uncover the common mistakes that lead to catastrophic equipment failure. The goal is to arm you with the technical knowledge to assess your own gear, make smart decisions, and ride with mechanical confidence, no matter what bike you’re on.
To help you navigate these critical considerations, this article is structured to build your technical knowledge from the ground up. The following summary outlines the key areas we will cover, from essential safety to advanced riding psychology.
Summary: Your Technical Guide to UK Bike Park Readiness
- Why a Full-Face Helmet Is Mandatory Even for Blue Runs?
- How to Set Your Sag Correctly for Rooty UK Tracks?
- Rent a Downhill Rig or Upgrade Your Trail Bike: Which Makes Sense?
- The Braking Mistake That Overheats Your Discs in 2 Minutes
- In What Order Should You Tackle the Trails at Dyfi Bike Park?
- Why Buying Cheap Rain Gear Will Ruin Your Hike in 30 Minutes?
- The Confidence Trap That Injures Intermediate Athletes Most Often
- Why Controlled Fear in Sports Resets Your Dopamine Levels?
Why a Full-Face Helmet Is Mandatory Even for Blue Runs?
Let’s get the most critical point out of the way first: a full-face helmet is not a recommendation for a bike park; it is a fundamental piece of your mechanical system. Riders often assume that speed is the primary factor in crash severity. They think, « I’ll be on blue runs, I won’t be going that fast. » This logic is flawed. The risk on bike park trails comes from engineered features—berms, rollers, and small jumps—that can cause a crash at any speed. A simple front-wheel washout in a loose berm can pivot your body forward and downward, resulting in a direct impact to the face and jaw.
The protective capability of a full-face helmet is not just a matter of opinion; it’s statistically proven. For instance, research from the Rhône Trauma Registry demonstrates that motorcyclists wearing full-face helmets are three times less likely to sustain facial injuries in a crash compared to those with open-face helmets. While the context is different, the impact physics are transferable to mountain biking. The chin bar is not for decoration; it’s a structural component designed to absorb and distribute the kinetic energy of an impact that would otherwise be concentrated on your jaw, teeth, and facial bones.
Bike parks are acutely aware of these risks. At Bike Park Wales, for example, their official policy mandates a helmet meeting the EN1078 standard as a bare minimum, but they explicitly and strongly recommend a full-face helmet certified to the more rigorous ASTFM F1952-DH standard. Their staff perform safety checks and have the authority to prevent riders with inadequate equipment from using the uplift and trails. They understand that even a « simple » blue trail has features that can lead to complex, life-altering facial injuries. Treating a full-face helmet as an optional extra is a fundamental misunderstanding of the forces involved in a bike park environment.
How to Set Your Sag Correctly for Rooty UK Tracks?
If the helmet is your primary safety system, your suspension is your primary control system. The single most important suspension setting is sag—the amount your suspension compresses under your static weight. It dictates your bike’s geometry and its ability to maintain traction. On the relentlessly rooty and chattery tracks common in UK bike parks, an incorrectly set sag is a recipe for disaster. Too little sag, and your bike will feel harsh, skittish, and unable to track the ground. Too much sag, and you’ll bottom out constantly, wallow in corners, and the bike’s steering will feel slow and unresponsive due to a slacker-than-intended head angle.
The goal is to find the sweet spot that allows the wheel to extend into dips (negative travel) and compress over bumps, keeping your tyre glued to the trail. For bike park riding, a good starting point is 20-25% sag for the fork and 25-30% for the rear shock. Critically, this must be set in the « attack position »—standing on the pedals with your weight centered, not sitting on the saddle. This represents your actual riding posture and ensures the chassis balance is correct when you’re descending.
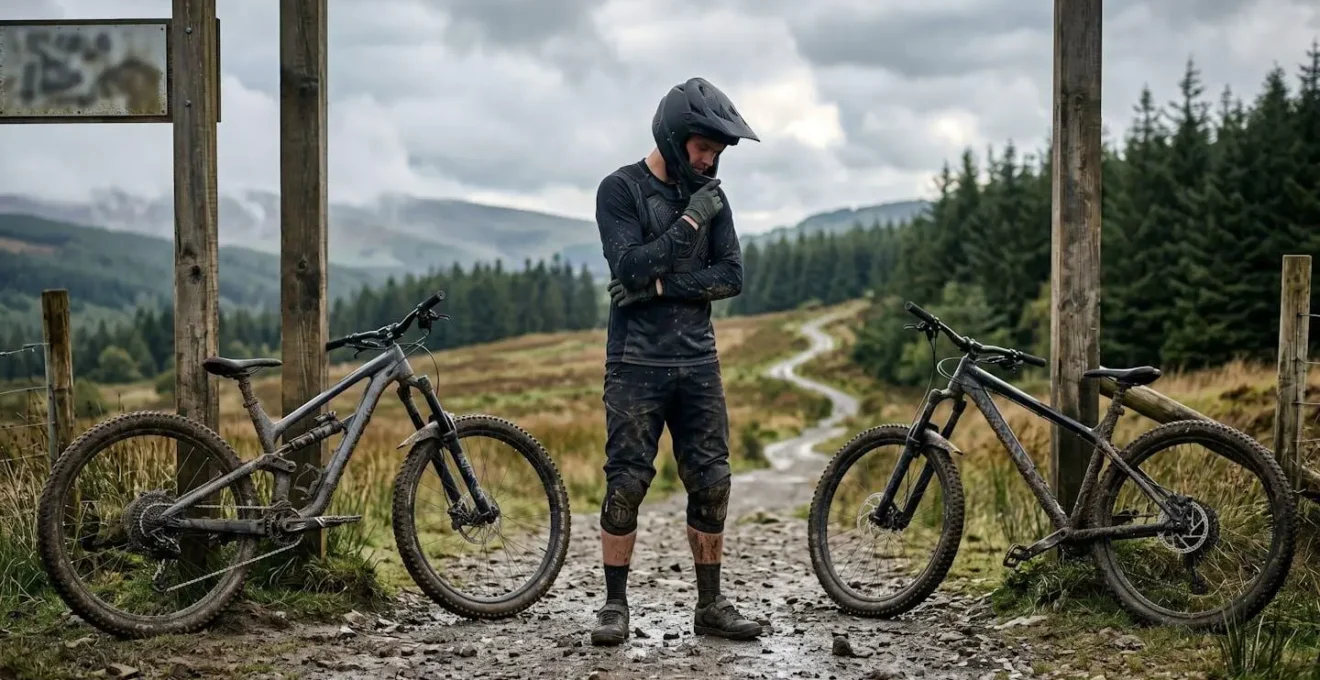
As the image above illustrates, when your bike hits a root, the suspension compresses to absorb the impact. Correct sag ensures there is enough travel available for this compression, while also allowing the wheel to drop back down quickly to maintain contact with the ground on the other side. This is the essence of suspension dynamics: a continuous cycle of compression and rebound that isolates you from the trail and maximizes grip. Getting this right is more important than having 20mm more or less travel.
Action Plan: Dialing in Your Attack Position Sag
- Gear Up: Wear your full riding kit, including your helmet, pack, and water, to accurately represent your total riding weight.
- Prepare Suspension: Set all compression and rebound dials to their fully open (fastest/softest) position. Ensure O-rings are on your fork stanchion and shock shaft.
- Cycle the System: Vigorously bounce on the bike 5-10 times to overcome seal stiction and equalize air chambers.
- Assume the Position: Stand on the pedals in your attack position, using a wall or a friend for balance. Do not sit down.
- Settle Weight: Let your weight settle naturally for a few seconds without bouncing. This is the crucial step where the suspension finds its sag point.
Rent a Downhill Rig or Upgrade Your Trail Bike: Which Makes Sense?
This is the central dilemma for many first-time park riders. The lure of a 200mm travel downhill (DH) bike is strong, promising to erase mistakes and smooth out the roughest trails. However, from a mechanical and skill-development perspective, this is not always the best choice. For a rider transitioning from trails, your own bike—even a hardtail or a 140-160mm trail bike—has a significant advantage: familiarity. You understand its braking points, its cornering characteristics, and its overall chassis balance. Jumping on a long, slack, heavy DH bike can be disorienting and may mask poor technique rather than help you improve it.
A more pragmatic approach is often to invest in a few strategic upgrades for your existing trail bike. The key areas to focus on are the components that manage grip and heat: tyres and brakes. A set of aggressive, dual-ply casing tyres with a soft compound will dramatically improve grip and puncture resistance. Similarly, upgrading to larger brake rotors (e.g., from 180mm to 203mm) and metallic (sintered) brake pads will significantly improve your brake’s thermal management capabilities, preventing fade on long descents.
The decision ultimately comes down to a cost-benefit analysis based on how frequently you plan to visit bike parks. The following comparison breaks down the typical costs and performance considerations, based on public data like the rental and safety guidelines from official sources like Bike Park Wales.
| Factor | Rental Downhill Bike (3 visits) | Trail Bike Upgrade Package |
|---|---|---|
| Upfront Cost | £150-£210 (£50-70 per day × 3) | £350 (tyres £150 + brakes £100 + service £100) |
| Capability on Black Runs | Excellent (200mm travel, dual-crown fork) | Moderate (depends on base bike, typically 140-160mm) |
| Familiarity & Confidence | Low initially (unfamiliar geometry/feel) | High (your known bike behavior) |
| Maintenance Responsibility | None (rental shop maintains) | Full (ongoing costs for service/wear) |
| Break-Even Point | Cost-effective for 1-3 annual visits | Cost-effective after 4+ visits |
| Blue/Red Trail Performance | Overkill (heavy, slower climbing) | Optimal (versatile, more fun on varied terrain) |
| Skill Development | May mask technique flaws with capability | Forces better technique, builds skill |
As the table shows, renting is a sensible option for one-off visits. But if you plan to ride parks more than three or four times a year, upgrading your trail bike becomes the more logical investment. It forces you to become a better rider by learning to choose lines carefully and use your body to absorb impacts, rather than relying solely on suspension travel.
The Braking Mistake That Overheats Your Discs in 2 Minutes
On the long, sustained descents of a bike park, your brakes are not just for stopping; they are a heat-management system. The most common and dangerous mistake riders make is « dragging » their brakes—maintaining light, constant pressure on the levers. This seems intuitive for controlling speed, but it’s mechanically catastrophic. It generates a steady, low-intensity heat that the system cannot dissipate, causing the brake fluid to boil, the pads to glaze over, and the rotors to turn blue. This is known as brake fade, and it results in a terrifying loss of all stopping power.
Skilled riders generally separate short, hard braking with longer periods of time off the brakes compared to beginners.
– BrakeAce Research Team, Why MTB Brakes Get Hot and What You Can Do About It
The correct technique is the opposite of dragging. You must think of braking in distinct phases. Identify sections of trail where you can brake hard and decisively *before* a corner or feature. This involves applying the brakes in short, powerful bursts. Then, you must completely release the levers to allow air to flow over the rotors and callipers, actively cooling the system. Each time you release the brakes, you are resetting their thermal capacity. This « on/off » method transforms your brakes from a heat-soaking sponge into an efficient heat-dissipating radiator.
Mastering this technique is crucial for managing the immense kinetic energy of you and your bike. To prevent overheating and maintain control, focus on these principles:
- Brake in Bursts: Apply firm pressure for 2-3 seconds, then release completely.
- Use Both Brakes: Distribute the heat load across both front and rear systems.
- Identify Braking Zones: Look for straight sections to do your heavy braking before you enter a feature.
- Allow Cooling Time: On very long runs, a brief 2-minute stop can allow your entire brake system’s temperature to drop significantly.
- Consider Hardware: If you still experience fade with good technique, upgrading to larger rotors (203mm or even 220mm) and sintered metallic pads is a necessary mechanical solution.
In What Order Should You Tackle the Trails at Dyfi Bike Park?
Arriving at a park like Dyfi, which is renowned for its steep, technical, and often intimidating black runs, can be overwhelming. The key to a successful and safe day is not to jump onto the signature trails immediately, but to follow a logical progression that allows you to calibrate your skills and bike setup to the unique terrain. Unlike trail centres, bike parks have a much steeper gradient in difficulty between grades. A red run at Dyfi is a significant step up from a typical trail centre red.
A smart approach for a first-time visitor, especially one testing their own trail bike, is to dedicate the first one or two runs to the « easiest » trails available. At Dyfi, this means starting on the red runs like ‘Super Swooper’ or ‘El-Dorado’. Do not treat these as warm-ups to be rushed. Instead, use them as calibration laps. Pay close attention to how your bike feels. Is your suspension bottoming out? Are your brakes feeling spongy at the bottom? Is your tyre pressure providing enough grip in the loamy corners?
Your plan for the day should be structured as follows:
- Run 1-2 (Reds): Ride a red run at 70% speed. Focus entirely on your bike’s feedback and your body position. Make any necessary suspension or tyre pressure adjustments after the first run.
- Run 3-4 (Reds with Pace): Ride the red runs again, but this time push the pace slightly. See how the bike behaves when loaded up in corners and under braking. This is where you test your chassis balance under pressure.
- Run 5 (First Black): Only after feeling completely confident on the reds should you consider a black run. Choose one of the less severe blacks, like ’50 Hits’. Ride it slowly, stopping to inspect features before you commit. The goal is to get down safely, not to set a time.
- Late Afternoon (Repeat or Progress): Based on your experience on the first black run, make a decision. If you felt on the edge, spend the rest of the day mastering the red runs. If you felt confident and in control, you can try another black run like the iconic ‘Slab’.
This methodical approach respects the difficulty of the park and acknowledges that you are a system—rider and machine—that needs to be calibrated. Rushing this process is the fastest way to find yourself in a situation that exceeds your mechanical or skill-based limits.
Why Buying Cheap Rain Gear Will Ruin Your Hike in 30 Minutes?
In the maritime climate of the UK, « waterproof » is a term that can be dangerously misleading. A cheap, plastic-like rain jacket will certainly keep rain out. However, it will also keep everything else in. As you exert effort on your bike, your body generates a massive amount of heat and moisture through sweat. If this water vapour cannot escape, it condenses on the inside of your jacket. Within 30 minutes, you are soaked from the inside out. This leads to rapid heat loss, a phenomenon known as « getting cold from the inside, » which is not only deeply uncomfortable but can be genuinely dangerous, leading to hypothermia even in mild temperatures.
High-quality rain gear, designed for sports like mountain biking, solves this problem through advanced fabric technology. These materials are a marvel of material science, typically constructed with a multi-layer membrane. The outer layer has a Durable Water Repellent (DWR) coating that makes water bead up and roll off. The critical component is the middle layer, a microporous membrane (like Gore-Tex or similar proprietary fabrics).
The pores in this membrane are too small for liquid water droplets to pass through from the outside, but large enough for individual water vapour molecules (your sweat) to pass through from the inside. This is what « breathability » means: it’s not about airflow, but about moisture vapour transmission. This physical process of thermoregulation is essential for maintaining a stable core body temperature and staying comfortable. Investing in a quality breathable waterproof jacket is not a luxury; it’s a fundamental requirement for performance and safety in unpredictable UK weather.
The Confidence Trap That Injures Intermediate Athletes Most Often
One of the most dangerous phases in a rider’s development is the intermediate plateau. This is the point where your confidence begins to outpace your actual, deeply-ingrained competence. You’ve cleared a few jumps, railed some berms, and you start to feel invincible. This is the « confidence trap, » a psychological state that leads directly to physical consequences. It’s a significant reason why research shows that up to 50% of mountain bikers report at least one serious acute injury during their riding career.
The trap is sprung when an intermediate rider attempts a feature that is just beyond their true skill level. They might have the physical strength and the basic technique, but they lack the deep, reflexive muscle memory to adapt when things go slightly wrong. A classic example of this is the over-the-bars (OTB) crash, which is one of the most common mechanisms for serious injury in the sport.
Case Study: The Over-the-Bars Injury Mechanism
Research on mountain bike injury patterns published in PubMed has consistently identified that the most common mechanism of serious injury involves a forward fall over the handlebars. This typically happens on a downhill section when the front wheel suddenly stops or slows due to a trail irregularity (like a root or rock) or a braking error. The rider’s momentum carries their centre of mass up and over the front axle, resulting in a direct impact to the head, torso, and upper extremities. This specific fall pattern is frequently associated with intermediate riders attempting a feature they have seen others clear, or repeating one they cleared once before but with less focus or in slightly different conditions. Their confidence tells them they can do it, but their reflexive skills aren’t developed enough to shift their weight back instantly when the front wheel stalls.
Escaping this trap requires a conscious, mechanical mindset. It means honestly assessing every feature and asking, « Can I clear this nine times out of ten, even when tired? » not « Did I get away with it once? » It requires a shift from a confidence-based approach to a competence-based one, where you only progress to a bigger feature after you have completely mastered the one before it. It’s about building a solid foundation of skill, not a fragile facade of bravado.
Key Takeaways
- A full-face helmet is non-negotiable; risk is determined by trail features, not just speed.
- Correct suspension sag (20-25% front, 25-30% rear) set in the attack position is more critical than total travel.
- Upgrading your trail bike’s tyres and brakes is often a better long-term investment for skill and finance than renting a DH bike.
Why Controlled Fear in Sports Resets Your Dopamine Levels?
Riding at a bike park is an exercise in managing fear. The feeling you get at the top of a steep, technical descent—the heightened senses, the laser focus, the pounding heart—is not just an emotion; it’s a profound neurochemical event. This state of « controlled fear » or « flow state » is intensely engaging because it forces your brain into the present moment. You are not thinking about work or daily stresses; you are entirely focused on the trail ahead. This experience is what resets your baseline and makes you feel alive.
From a neurological perspective, when you successfully navigate a challenging section, your brain releases a cocktail of neurotransmitters, including dopamine and adrenaline. This is not the same as the shallow, constant dopamine drip from social media or other low-effort rewards. This is a powerful, earned reward. It’s the brain’s way of saying, « You faced a significant challenge, you survived, and you succeeded. Do that again. » This process is fundamental to learning and motivation. It reinforces the neural pathways associated with the skill you just executed, making it easier and more automatic the next time.
This state of high-consequence focus is where real skill is built. The fear sharpens your perception, forcing you to process information from the trail with incredible speed and accuracy. Over time, you learn to distinguish between « bad fear » (panic, lack of control) and « good fear » (respect for the challenge, heightened awareness). Harnessing this good fear is the ultimate goal. It’s what allows you to push your limits safely, growing your skills while enjoying the profound mental clarity that only high-stakes sports can provide. It’s the reason why, after a challenging day at the park, you feel exhausted but also completely reset and mentally refreshed.
Now, apply this technical mindset. Before your next park day, go through your own bike with this guide in hand. Check your gear, set your sag, and make an honest assessment of your equipment’s capabilities. This preparation is the first step to riding faster, safer, and with more confidence.